Deploying Citrix NetScaler on Nutanix AHV
Citrix NetScaler VPX, the virtual appliance, is available for XenServer, VMWare ESX, Microsoft Hyper-V and KVM hypervisors. Since Nutanix AHV is based on KVM, it is possible to run your NetScaler VPX on the Nutanix native Acropolis hypervisor AHV.


NetScaler Gateway VPX is a virtual NetScaler Gateway appliance that is hosted on a hypervisor. NetScaler Gateway VPX supports all the features and functionality of the physical NetScaler Gateway appliance.
Kees Baggerman (@KBaggerman) wrote an article, published on his blog some time ago. With the latest release of Citrix NetScaler 12.0 and a couple of Nutanix releases later, I was wondering if this is still working and if we can simplify the deployment steps needed. My facit is yes it works, and yes it has become easier. Here is my how-to deploy Citrix NetScaler 12.0 on Nutanix AHV.
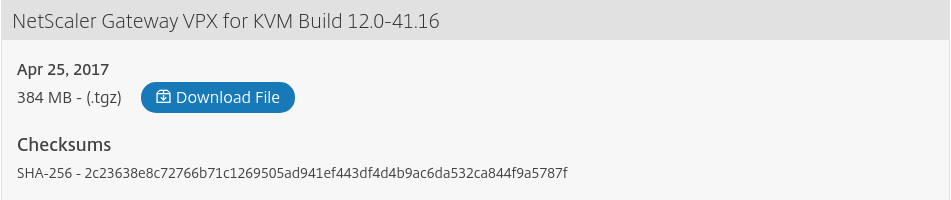
- As a first step you need to download the NetScaler VPX for KVM Build from download.citrix.com.
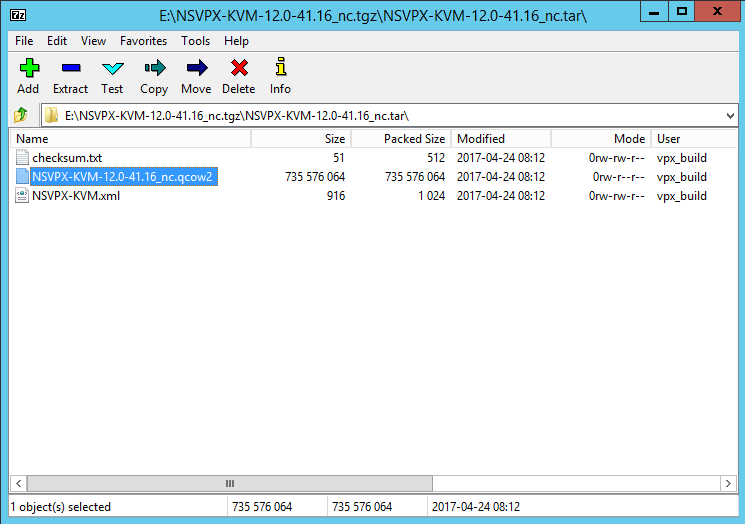
- The download is a .tgz archive. We need to extract the disk image from this file. I used 7-Zip to grab the NSVPX-KVM-12.0-41.16_nc.qcow2 file. That's all we need to deploy our NetScaler VPX on Nutanix Acropolis Hypervisor.
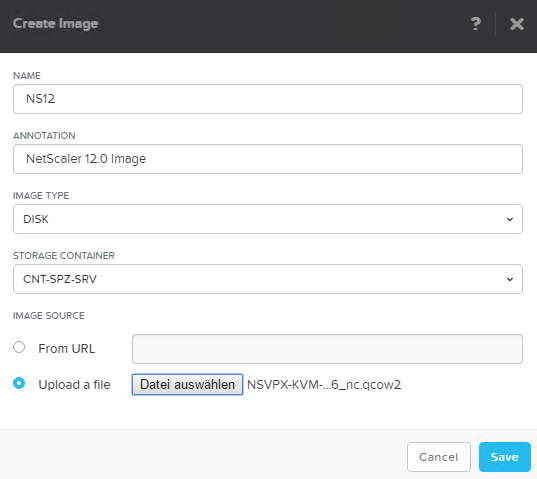
- Now we need to upload this disk image to the Image Configuration within Nutanix Prism. Place the image in the container where you also want sit your NetScaler VPX disk.
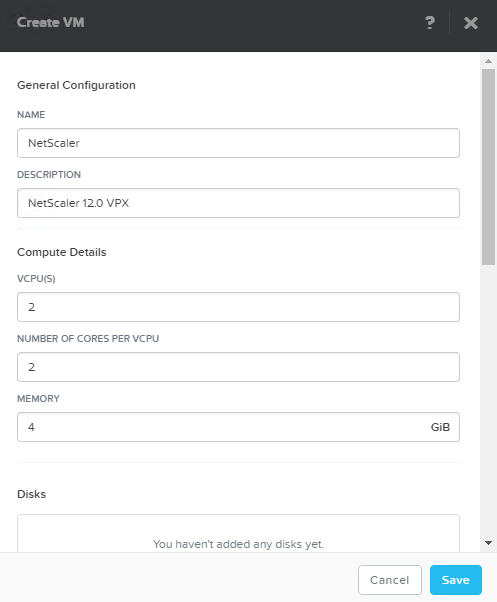
- Create the NetScaler VM with at least 2 vCPUs and 4 GB memory, remove the CDROM from the disk section and add a NIC sitting in your desired VLAN.
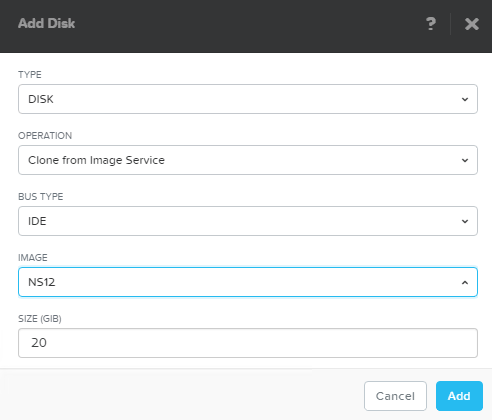
- Add a disk by cloning from Image Services and selecting your uploaded disk image from step 1. Make sure to choose IDE as bus type. Save your settings and create the VM.
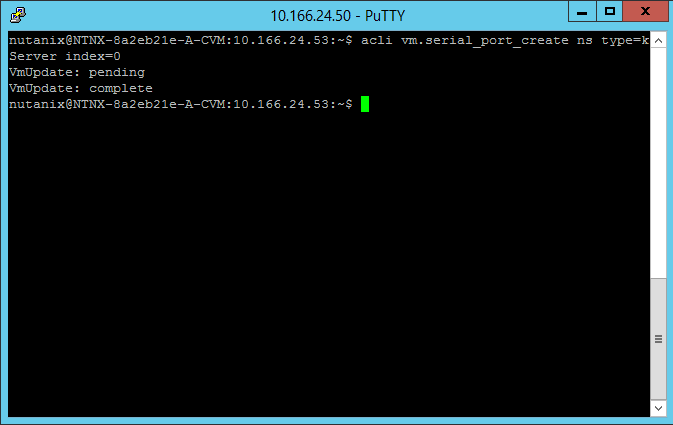
- To make our NetScaler VM bootable it is still necessary to add a serial port to the VM. This can be done only through CLI, so we have to connect to the Nutanix CVM and execute the following command. Replace with the name of your NetScaler VM created in step 3.
acli vm.serial_port_create <VM Name> type=kServer index=0
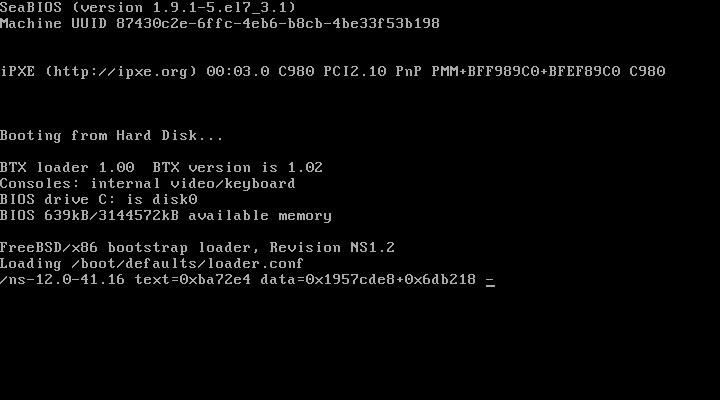
- Now we are ready and can power on the VM. If everything works as expected, the NetScaler VPX will boot and we can move on with the initial IP configuration through command line.
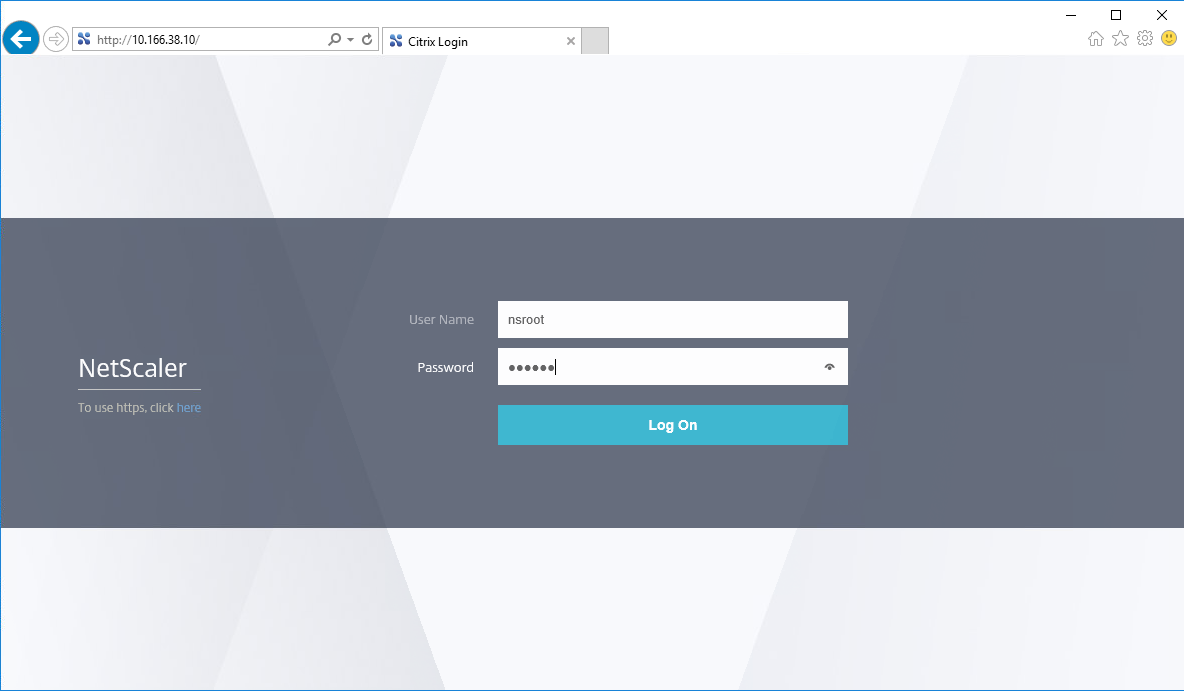
- Log in to the NetScaler CLI with the default user / password, which is nsroot / nsroot. From here you can do the initial IP configuration by entering config ns.
config ns
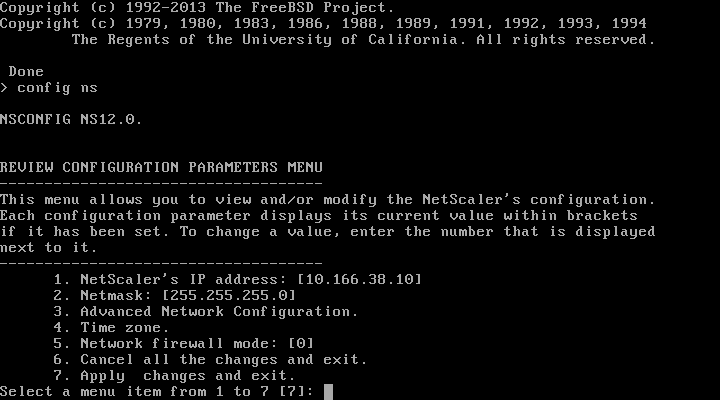
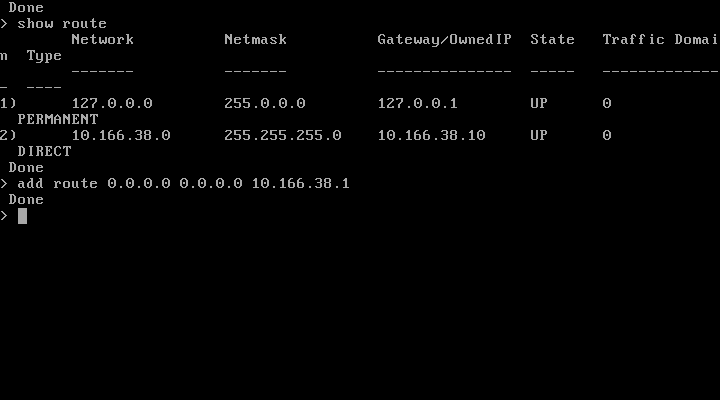
- Probably the IP of your NetScaler will not be in the same Subnet as your management station, so you also have to set a default gateway. This is done via CLI.
add route 0.0.0.0 .0.0.0.0 X.X.X.X
Don't forget to save your config.
save ns configReboot your NetScaler.
reboot
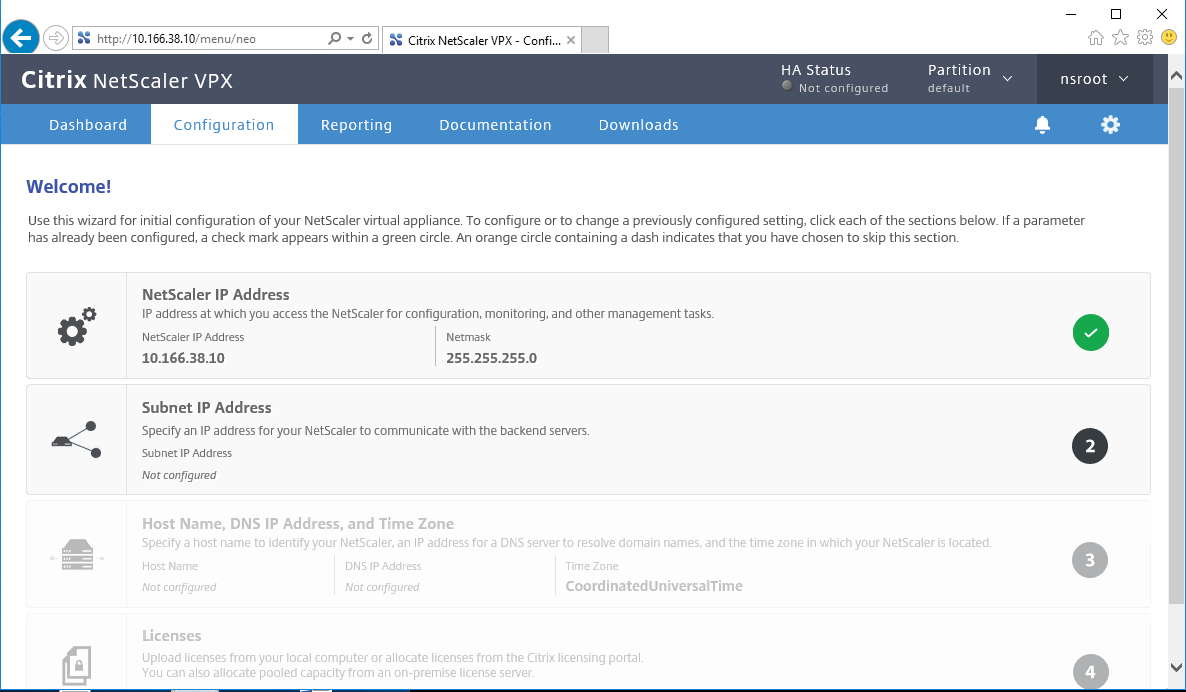
- After the reboot you can browse to the NetScaler IP and log into the management interface to set up and configure all the shiny NetScaler features.