How-to migrate from Citrix XenServer 7 to Nutanix AHV
To migrate your existing VMs from XenServer 7 to Nutanix AHV there are a couple of steps required. You have to prepare the source VMs, identify the VHD files, move the VHD to a Nutanix Container, import the disk images and re-create the VM in Nutanix Prism.

To migrate your existing VMs from XenServer 7 to Nutanix AHV there are a couple of steps required. You have to prepare the source VMs, identify the VHD files, move the VHD to a Nutanix Container, import the disk images and re-create the VM in Nutanix Prism.
Prepare the source VM
- Remove all XenServer related devices listed in device manager. Make sure to display also hidden devices.
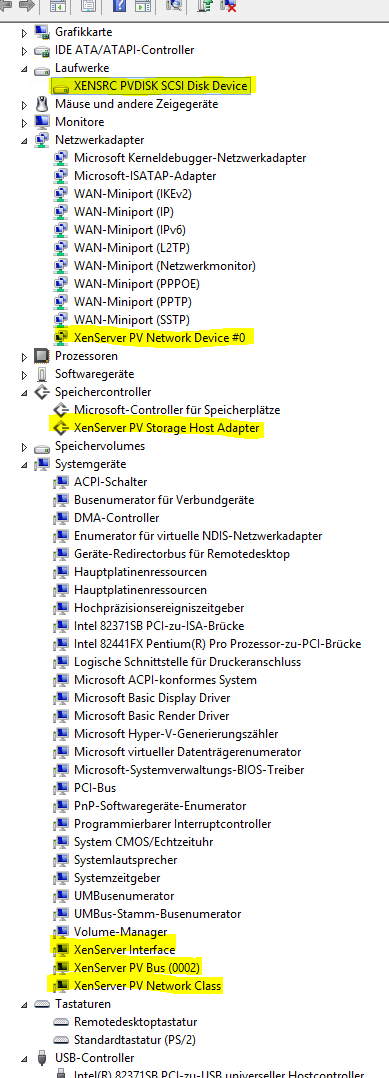
Remove XenServer related devices - Uninstall Citrix XenServer Windows Management Agent form add/remove programs
- Install Nutanix VM Mobility 1.0.1 for Windows, the msi installer can be downloaded from portal.nutanix.com
- Open regedit and manually delete the following registry keys
-
HKEY_LOCAL_MACHINE\SYSTEM\CurrentControlSet\Services\XEN
-
HKEY_LOCAL_MACHINE\SYSTEM\CurrentControlSet\Services\xenbus
-
HKEY_LOCAL_MACHINE\SYSTEM\CurrentControlSet\Services\xendisk
-
HKEY_LOCAL_MACHINE\SYSTEM\CurrentControlSet\Services\xenfilt
-
HKEY_LOCAL_MACHINE\SYSTEM\CurrentControlSet\Services\xeniface
-
HKEY_LOCAL_MACHINE\SYSTEM\CurrentControlSet\Services\xenlite
-
HKEY_LOCAL_MACHINE\SYSTEM\CurrentControlSet\Services\xennet
-
HKEY_LOCAL_MACHINE\SYSTEM\CurrentControlSet\Services\XenSvc
-
HKEY_LOCAL_MACHINE\SYSTEM\CurrentControlSet\Services\xenvbd
-
HKEY_LOCAL_MACHINE\SYSTEM\CurrentControlSet\Services\xenvif
-
- Reboot the VM
- Make sure there are no more XenServer related devices and services in your VM
- Shutdown your VM
Create a Nutanix Container and mount it as NFS storage to Citrix XenServer
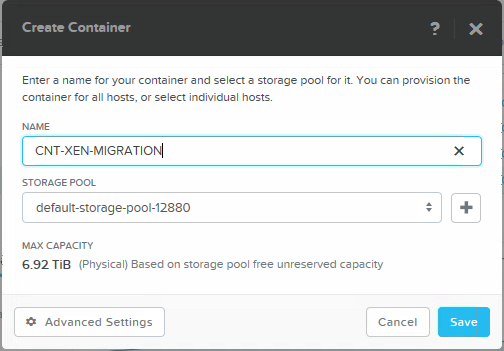
- In Nutanix Prism create a storage container where you will temporary place your VHD files during migration
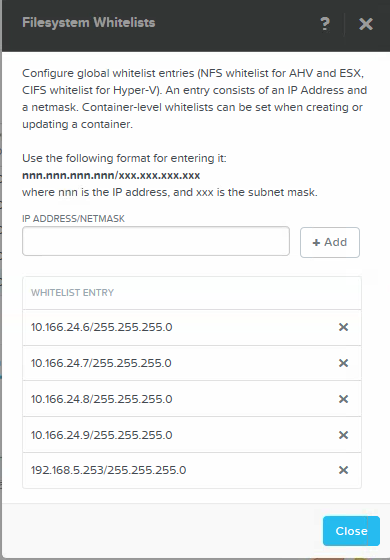
- Whitelist your XenServers, to allow NFS mounting of the container as SR
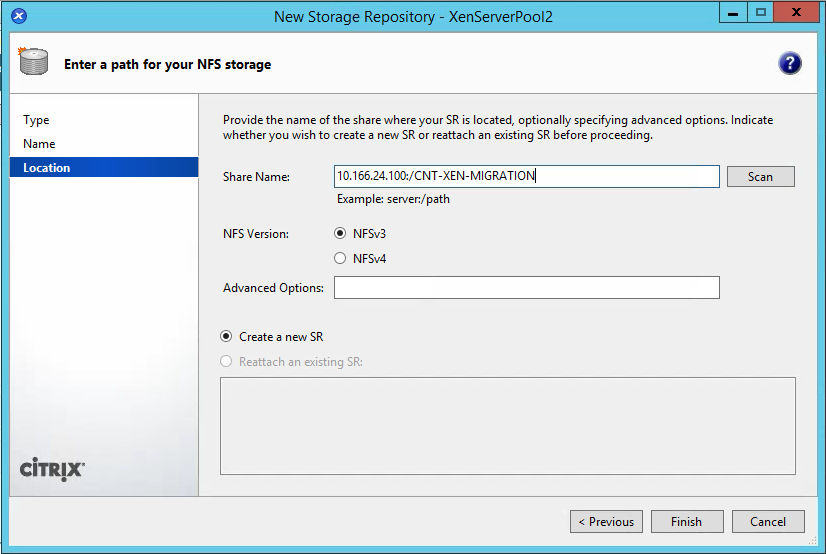
- Mount the container as NFS storage to XenServer. Connect with your Prism admin account to the Cluster IP [ClusterIP:/Container], use NFSv3 and create an new SR.
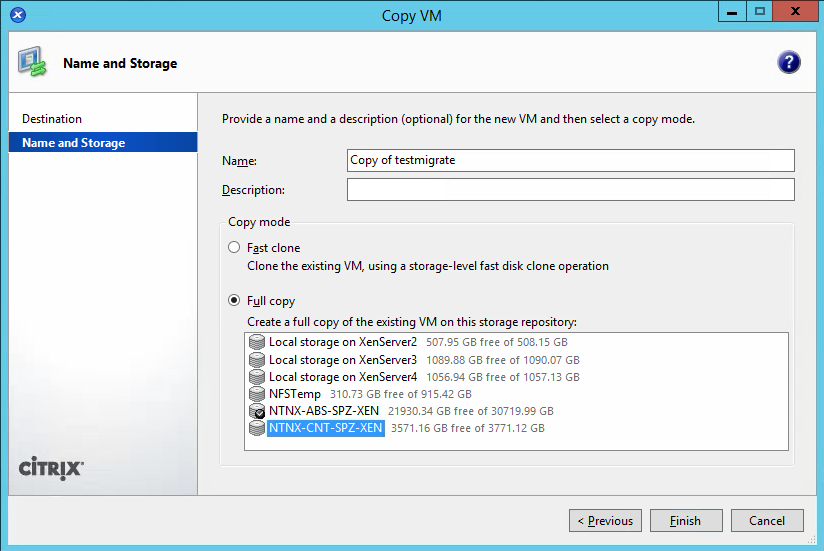
- Copy or Move the VM to the temporay NFS storage. Make shure to do a full copy!

Identify the VHD files of your VM
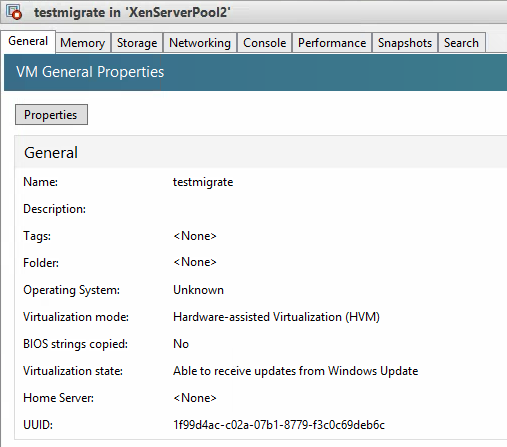
- Lookup the UUID of your VM in XenCenter
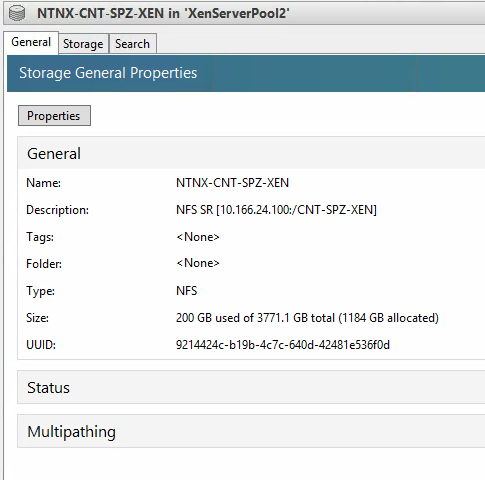
- Lookup the UUID of the mounted Nutanix container
- To find the UUID of your VHD files we need to dig into a XenServer console session and use the command shell and enter
xe vm-disk-list uuid=[UUID of the VM]
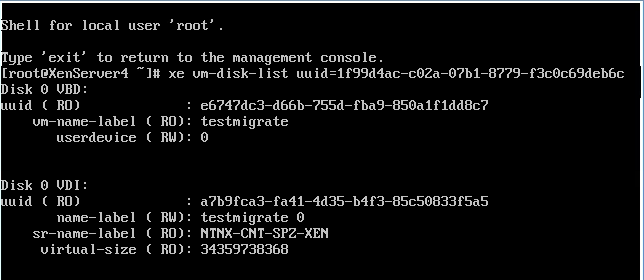
- Note: we need the UUID of the VDI Disk(s)
Import the disk image(s) through Prism into the AHV Image Service
- In Prism UI go to Image Configuration -> Upload Image
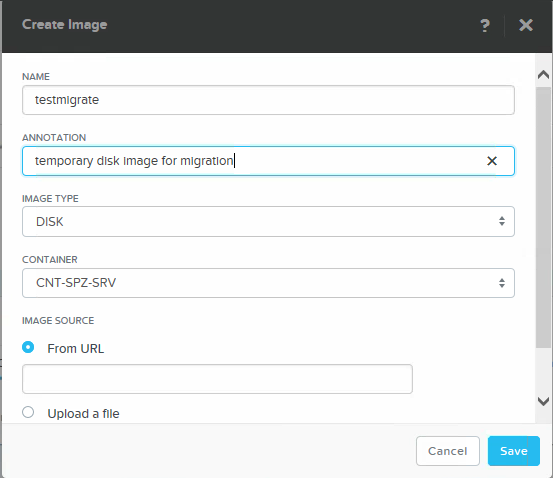
- Chose Disk as Image Type and select the container where you want the VHD to be saved after the migration
- For the URL enter the path to your temporary VHD location on NFS SR
nfs://127.0.0.1/[Container Name]/[UUID of SR]/[UUID of VHD].vhd
- Click Save. The upload will take some time, depending on the size of the VHD file.
Re-create the VM in Nutanix Prism
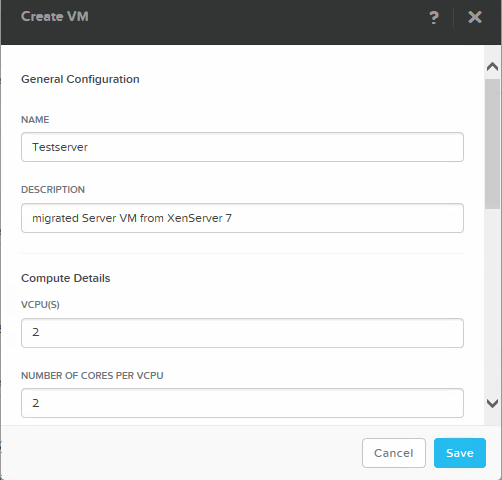
- Create a new VM in Prism
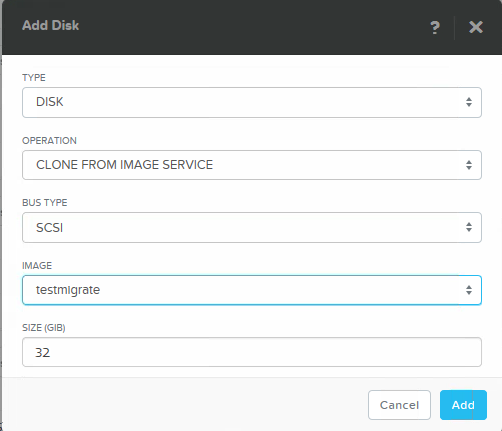
- Add Disk to the VM and choose Clone from Image Service, select the uploaded disk image
- Add new NIC
- Save
- Power on the VM
Your VM is migrated from XenServer 7 and runs now on Nutanix AHV. You may delete the VM on XenServer, remove/destroy the temporary NFS storage from XenServer, delete the temporary storage container on Nutanix and delete the temporary image from Image Service.